Systems up or down


Webex Voicemail

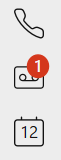
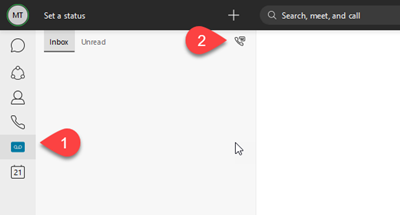
If you see a red badge counter for any of the left-hand navigation options, e.g. Calls or Voicemail, this means that there has been recent/new activity in that section which you have not acknowledged or actioned. The number indicates how many new activities there are.

Once you have acknowledged or actioned all new items within that section the red circle will disappear.

red-circle.png

  1. Click Voicemail
  2. All your voice-mail messages will display
  3. Click the desired message
  4. Click Play
    NOTE: The playback bar allows you to play, pause and skip forward and back in the voice message.

Once you have listened to the message use the buttons below the playback bar to call the person back, delete the message or mark the message as read.

If you are accessing your voicemail for the first time, or have forgotten or misplaced your voicemail PIN, you can easily set or reset it via settings.webex.com.

  1. Go to settings.webex.com.
  2. Enter your University email account and click sign in
  3. At the Federated logon page enter your username and password
  4. Click on Reset Voicemail PIN
  5. Enter your new Voicemail PIN. Use this PIN to access your voicemail box.

Once you have successfully accessed your voicemail box, you may change your PIN anytime by following the voicemail menu options or via settings.webex.com.

  1. Click on the Voicemail icon in the side menu.
  2. Click the Call Voicemail button to dial into your voicemail number to set up your personalised greetings, send voice messages, and more.
  3. Enter your PIN followed by # to access the voice portal - If you have not set/reset your pin see these instructions.
     webex-vm1.png

Standard voicemail options

There are two standard voicemail greetings - one that plays if you don't pick up and one that plays if you are already on a call. These need to be recorded separately - the same recording can't be used for both instances. If you choose not to record a personalised message a default message will play.

Press 1 to access your voicemail box

  • Press 1 to listen to your messages
  • Press 2 to record a mailbox busy greeting (if you have your name recorded it will use that as a default busy greeting)
  • Press 3 to record mailbox no answer greeting (if you have your name recorded it will use that as a default busy greeting)
  • Press 4 to access the extended away greeting menu (see extended away greeting options below)
  • Press 5 to compose and send new message
  • Press 7 to delete all messages

Press 3 to go to the greetings Menu to record your name

  • Press 1 to record your name

Press 8 to change your passcode

Extended away greeting options

An additional voicemail option is the 'extended away'. When 'extended away' is activated your greeting is played after the first ring and the caller will not be able to leave a message. This prevents your voicemail box filling up during your absence.

An example where you might utilize an ‘extended away greeting’ could be, maternity leave or a career break.

You can call your voicemail portal either by dialing your business phone number or by pressing the message button, if applicable.

Proceed to enter your passcode, usually a 4-digit number followed by the pound (#) key. The prompt for the voicemail menu options will begin.

  • Press 1 to access your voice mailbox
  • Press 4 to access the Extended Away Greeting menu.
    • Press 3 to record your Extended Away Greeting. You will be prompted to record your message following the tone. Once finished, click on the pound key.
    • To activate your Extended Away Greeting, press 1.
  • Your Extended Away Greeting has now been activated.
    Note: To deactivate the Extended Away Greeting, repeat these steps. When prompted, press 2 to deactivate the Extended Away Greeting.

NOTE: An example of a Shared Extension would be a reception phone number or the IT Help Desk e.g. 25000.

Accessing Voicemail options for Shared Extensions in WebEx

  1. Dial 26700 from WebEx
  2. Press *
  3. Enter your mailbox number
    NOTE: If you do not know the mailbox number you will need to contact the IT Help Desk.
  4. Enter your PIN
    NOTE: If you do not know the PIN you will need to contact the IT Help Desk.

Standard voicemail options

There are two standard voicemail greetings - one that plays if you don't pick up and one that plays if you are already on a call. These need to be recorded separately - the same recording can't be used for both instances. If you choose not to record a personalised message a default message will play.

Press 1 to access your voicemail box

  • Press 1 to listen to your messages.
  • Press 2 to record a mailbox busy greeting (if you have your name recorded it will use that as a default busy greeting).
  • Press 3 to record mailbox no answer greeting (if you have your name recorded it will use that as a default busy greeting).
  • Press 4 to access the extended away greeting menu (see extended away greeting options below).
  • Press 5 to compose and send new message.
  • Press 7 to delete all messages.

Press 3 to go to the greetings Menu to record your name

  • Press 1 to record your name.

Press 8 to change your passcode

Extended away greeting options

An additional voicemail option is the 'extended away'. When 'extended away' is activated your greeting is played after the first ring and the caller will not be able to leave a message. This prevents your voicemail box filling up during your absence.

An example where you might utilise an ‘extended away greeting’ could be, maternity leave or a career break.

You can call your voicemail portal either by dialing your business phone number or by pressing the message button, if applicable.

Proceed to enter your passcode, usually a 4-digit number followed by the pound (#) key. The prompt for the voicemail menu options will begin.

  • Press 1 to access your voice mailbox
  • Press 4 to access the Extended Away Greeting menu.
    • Press 3 to record your Extended Away Greeting. You will be prompted to record your message following the tone. Once finished, click on the pound key.
    • To activate your Extended Away Greeting, press 1.
  • Your Extended Away Greeting has now been activated.
    Note: To deactivate the Extended Away Greeting, repeat these steps. When prompted, press 2 to deactivate the Extended Away Greeting.